

Follow up on NPS responses
Set up a webhook-triggered automation to trigger follow-up responses for people who respond to your Satismeter NPS surveys!
As a part of this guide, you’ll:
- Set up a webhook-triggered automation, capturing a response from Satismeter when someone fills out your survey and converting it to an event.
- Set up an event-triggered automation (using the Satismeter event) to message people based on their net promoter score (NPS).
Before you begin
You’ll need access to your Satismeter account and your Customer.io Site ID and API Key credentials. You can find your Customer.io Site ID and API Key credentials under Integrations > Customer.io API.
Satismeter events have the same general shape, but we’ll base this tutorial off the following example data:
{
  "event": "completed",
  "response": {
    "answers": [
      {
        "id": "00000000000000",
        "label": "How would you rate the support?",
        "value": 5
      },
      {
        "id": "00000000000000",
        "label": "Select your favourite feature from the list",
        "value": "Dashboard filters"
      },
      {
        "id": "00000000000000",
        "label": "Do you have any comments for us?",
        "value": "You are awesome!"
      }
    ],
    "category": "promoter",
    "completed": true,
    "created": "2015-07-31T19:48:07.648Z",
    "feedback": "You are awesome!",
    "id": "00000000000000",
    "ip": "88.100.78.186",
    "location": {
      "city": "Springfield",
      "country": "US",
      "long": "Springfield, United States",
      "short": "Springfield"
    },
    "method": "In-app",
    "project": "00000000000000",
    "rating": 6,
    "referrer": "https://app.satismeter.com/sample",
    "user": {
      "email": "homer@simpson.com",
      "name": "Homer Simpson",
      "traits": {},
      "userId": "1234"
    }
  }
}
Set up your webhook-triggered automation
This workflow will convert your incoming Satismeter event—sent when someone fills out your NPS survey—to a Customer.io event. We’ll use this event to trigger an automation to respond to people who filled out your survey depending on their net promoter score.
-
Go to Automations and click Create Automation.
-
Click the trigger block then choose Webhook.
-
Copy the Webhook URL.
-
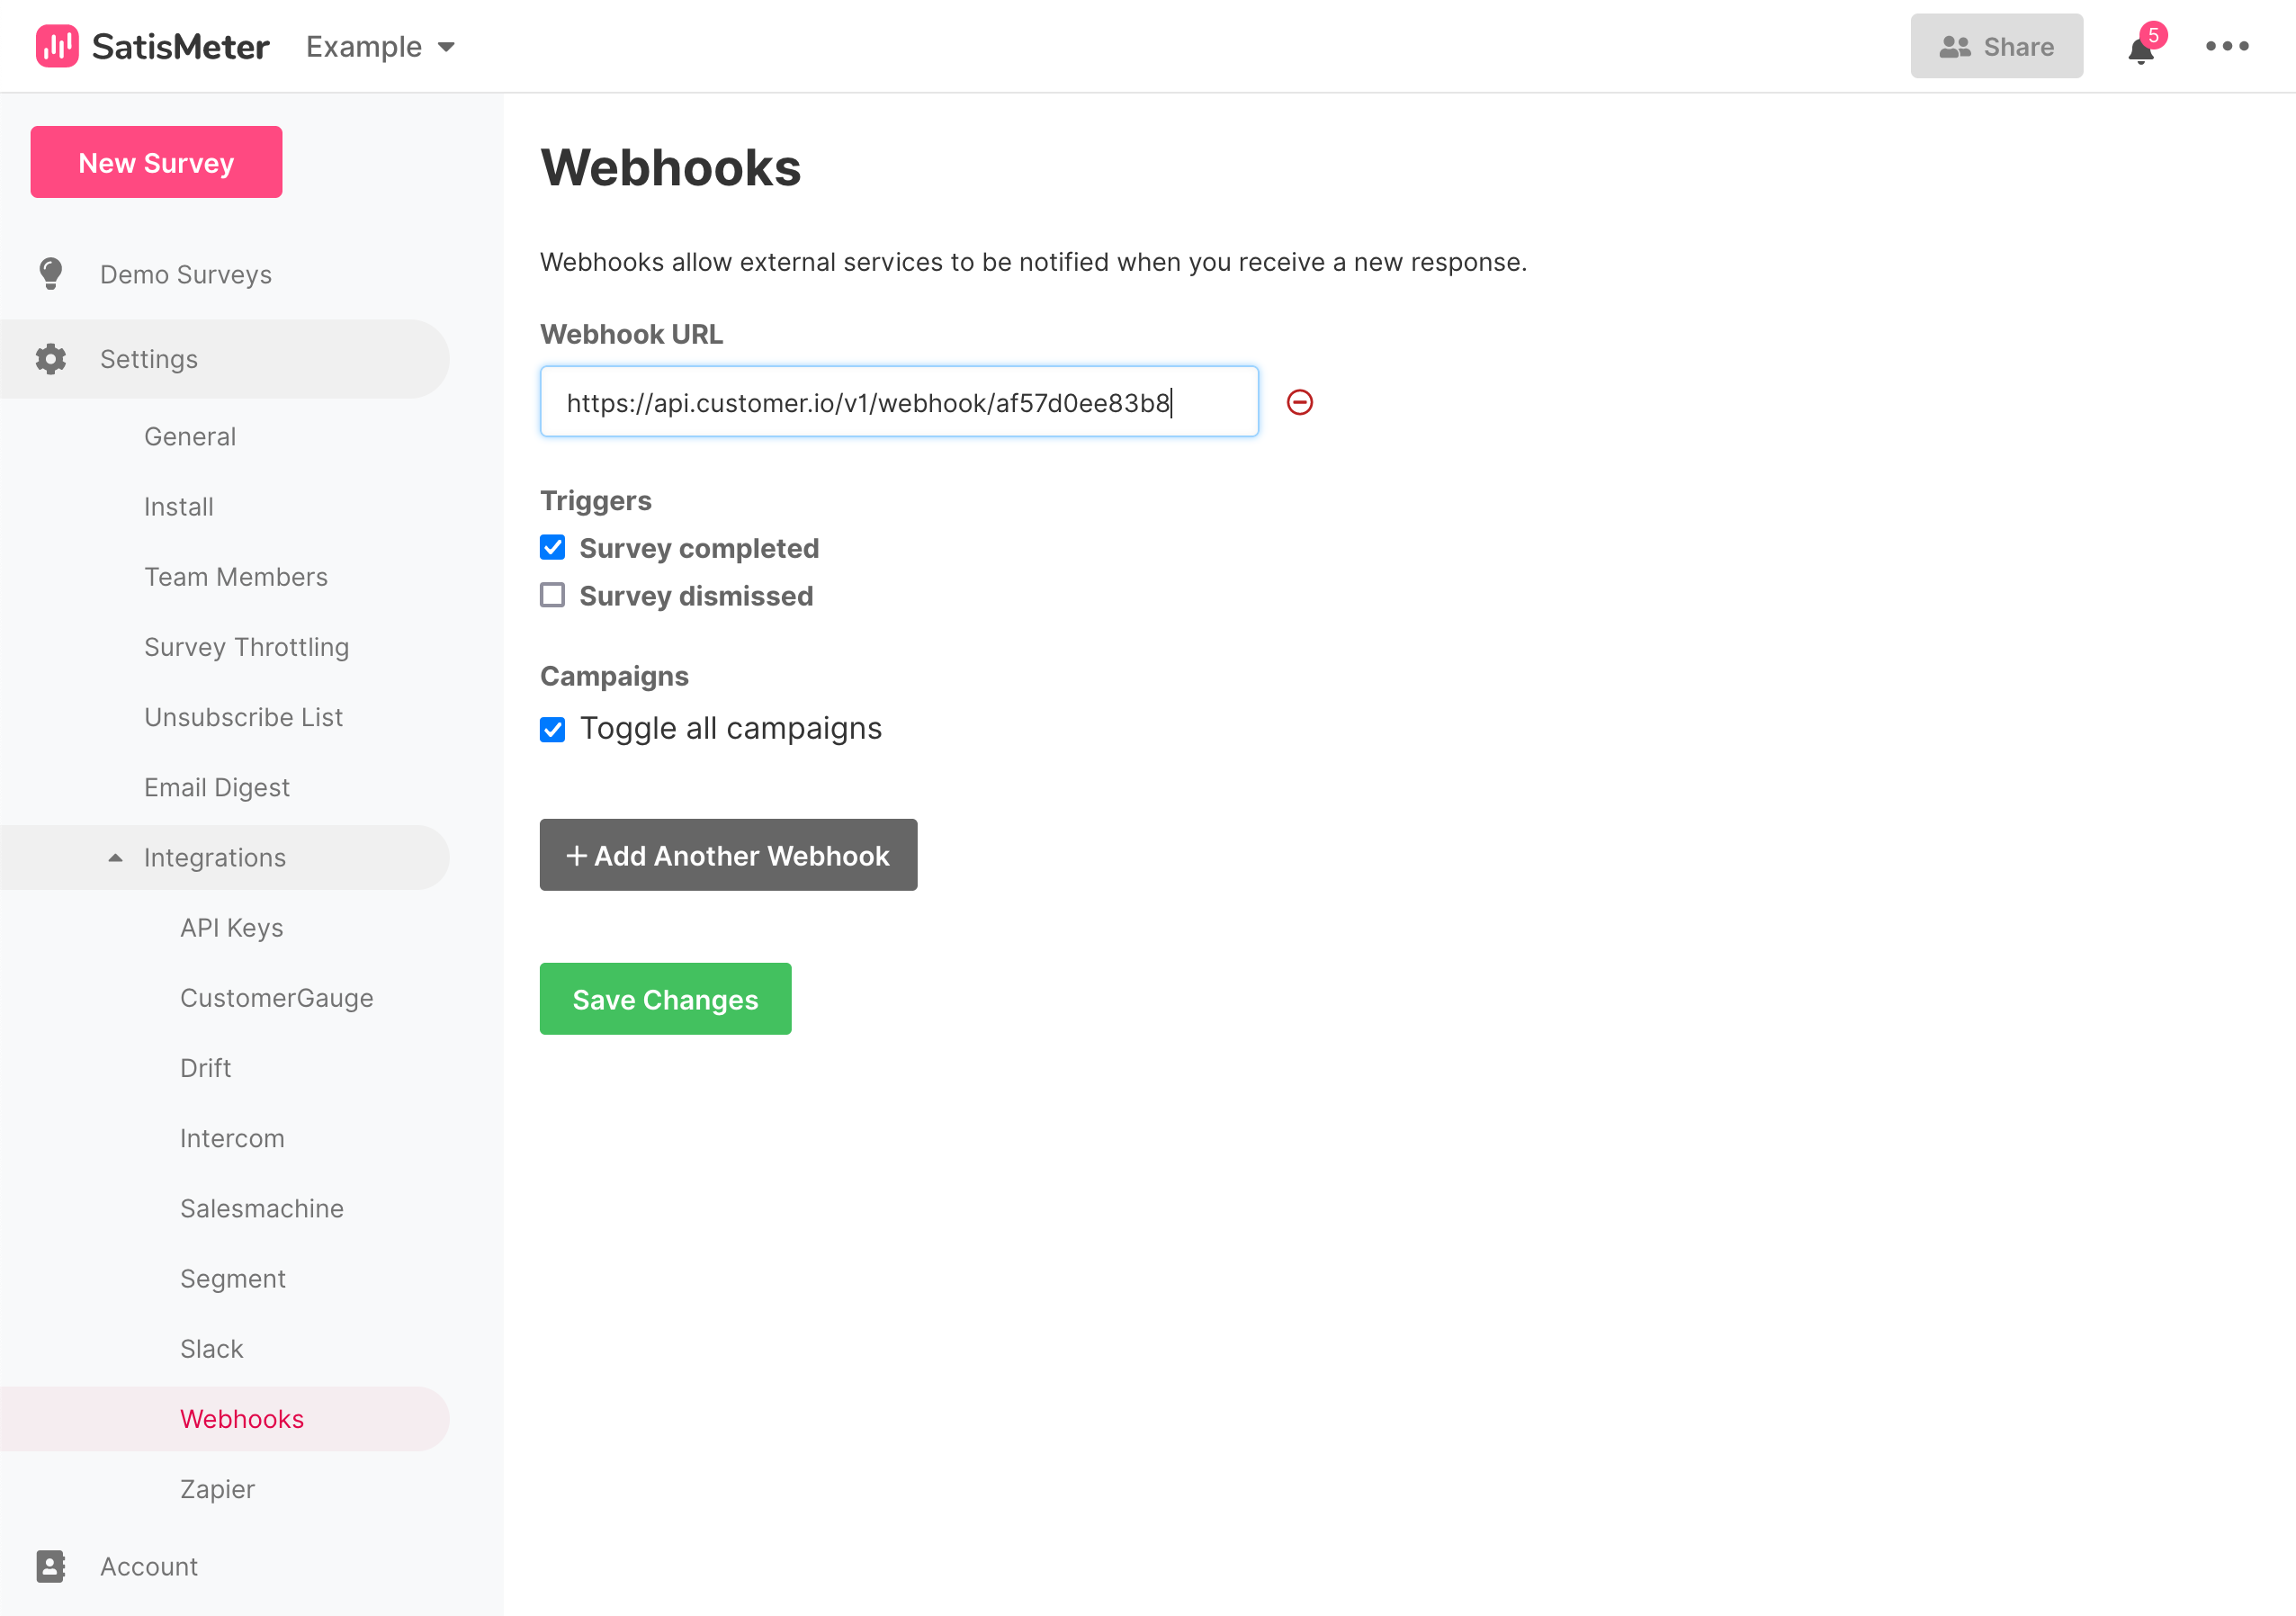
In Satismeter, go to Settings > Integrations > Webhooks and click Add Another Webhook.
- Paste the Webhook URL that you copied from Customer.io in the Webhook URL field.
- Select the Survey completed Trigger, and then click Save changes.
- If possible, fill out your Satismeter form as a test. This will send test data back to Customer.io, which can help you set up your automation.
-
Return to Customer.io and click Save and build workflow.
-
Drag Send Event into your workflow and click it.
-
Set an Event Name and click Add event.
-
Under Find or add person, select email and then click the
emailvalue in your sample Trigger data. -
For the Event Name, set Static value to NPM survey submitted.
-
Under Event Attribute, add an attribute called rating and click the
ratingin your Trigger data.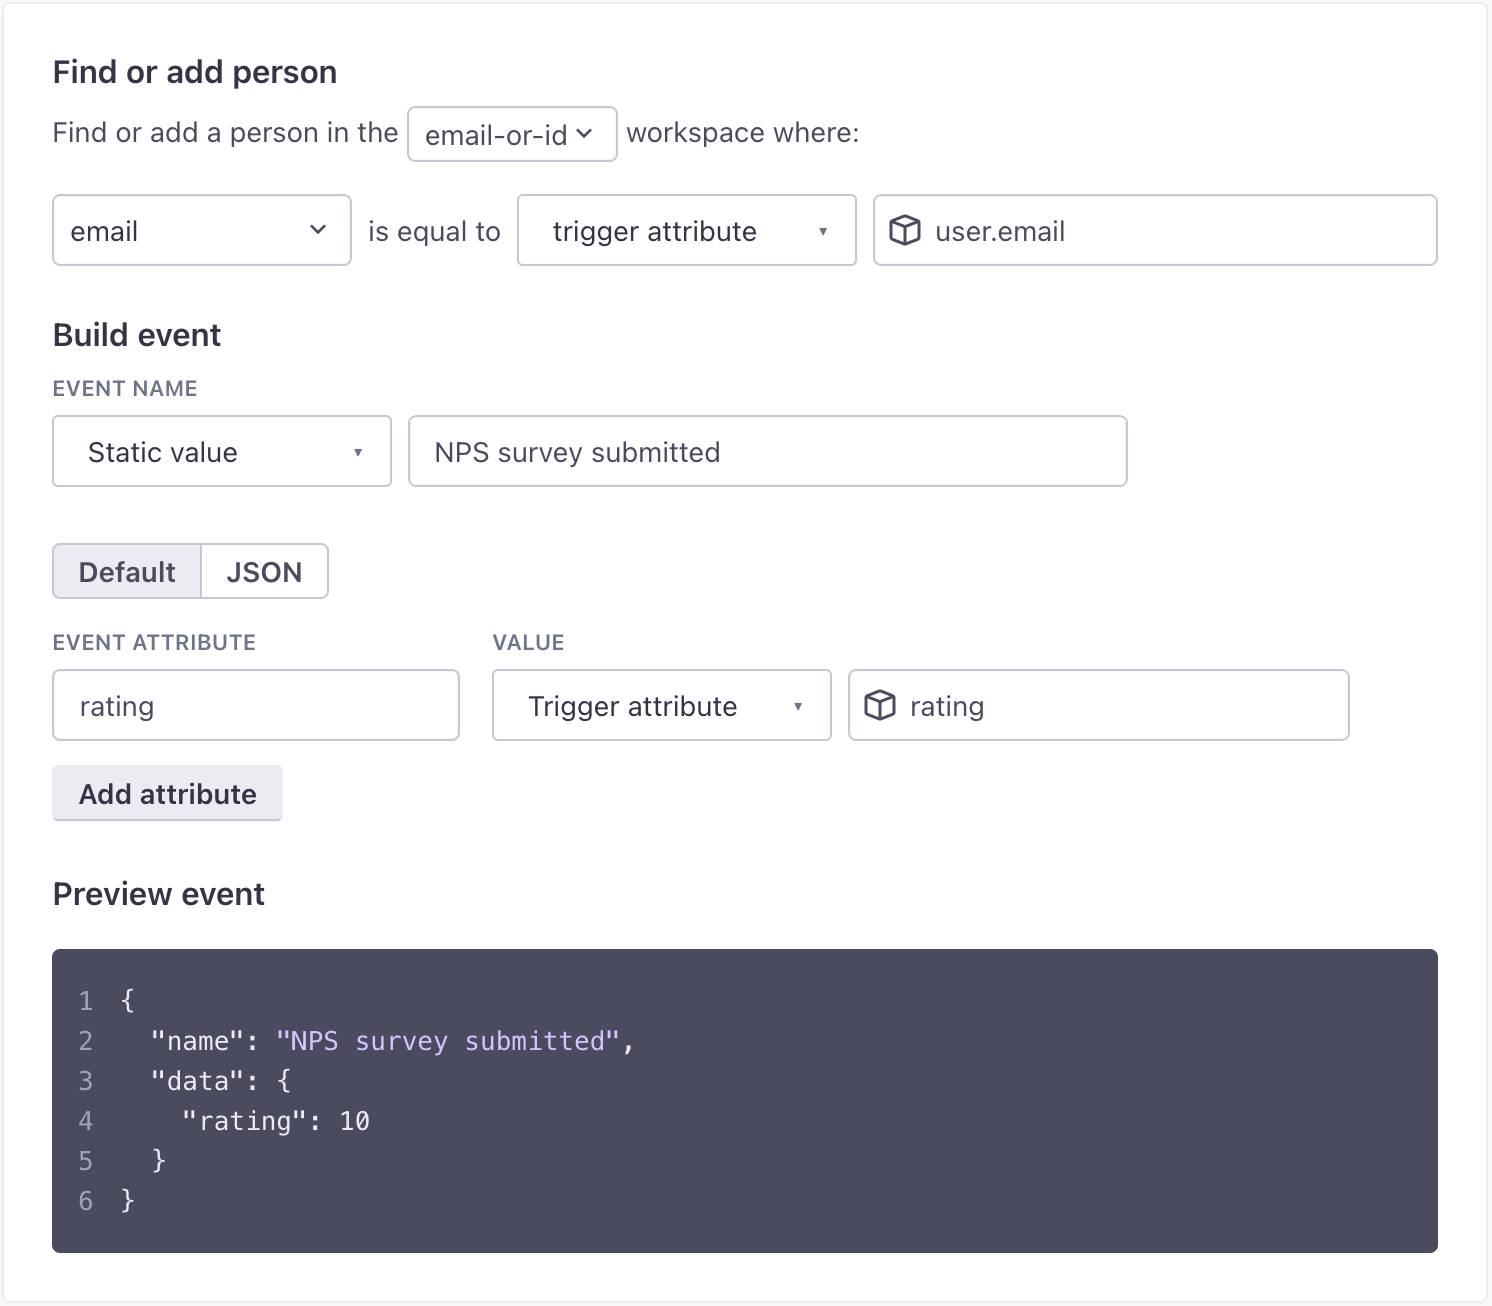
-
Click Save changes. Now you’re ready to set up your automation to message people who responded to your NPS survey!
Set up your event-based automation
You’ll trigger your automation from the nps survey submitted event you set up in your webhook-triggered automation.
- Go to Automations and click Create Automation.
- Click the trigger block, and click Event as the trigger type.
- Set
nps survey submittedas the trigger event and then filter the event data for dissatisfied customers. In this example, we want people who rated us below 7.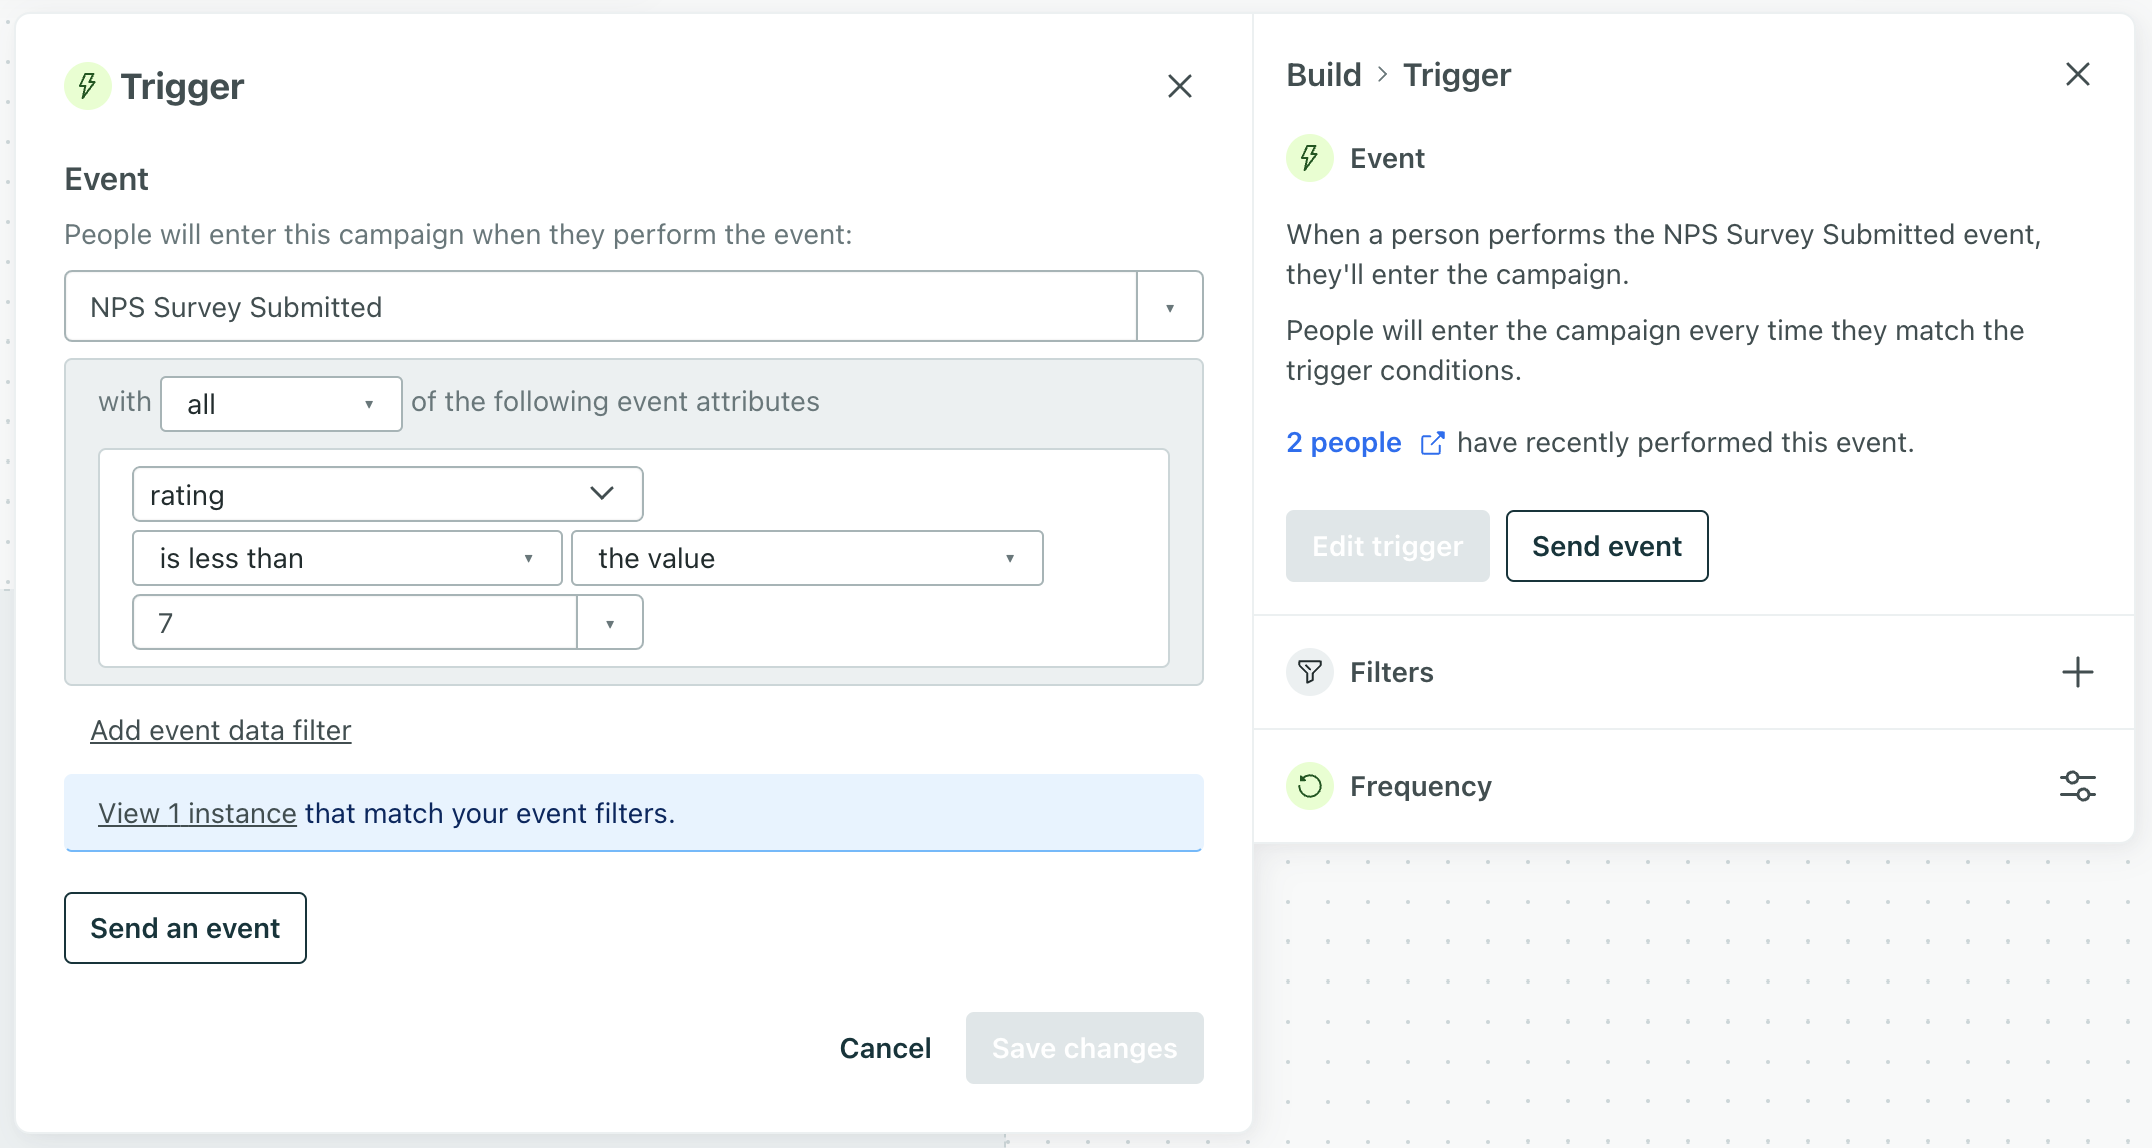
- In your workflow, add your message. In our case, we’re only responding to people who gave us a score of 7 or less. However, if you don’t filter by rating, you might:
- Create a multi-split branch by rating (people who gave you a rating less than 7, between 7 and 8, or above 8) to send different messages to people based on their NPS score.
- Send a single, more generic message, using liquid
A syntax that supports variables, letting you personalize messages for your audience. For example, if you want to reference a person's first name, you might use the variable
to differentiate different ratings.{{customer.first_name}}.
- When you’re finished, click Save & Next, and finish configuring your automation. Now, when someone fills out your Satismeter NPS survey, you can send them a response automatically!