

Automations with transactional messages
You can use an automation to send a transactional message. This can be helpful if you want to send transactional messages that aren't email or push notifications, or you want to perform multiple actions in response to a transactional event.
How it works
A transactional message is a message that your audience expects to receive even if they’ve opted out of marketing messages—like purchase receipts, password reset requests, shipping updates, etc.
In most cases, we suggest that you use our transactional API to send transactional messages. But, if you need to send a transactional message over a channel other than email, SMS, push, in-app, or inbox messages, or you want to perform additional actions—like attribute changes, etc—you may need to set up a transactional automation.
In this case, you’ll send an event to trigger your automation—and set up your workflow to send a transactional message and perform other downstream actions. For example, here’s a password reset request example, in which we update a user’s attributes and send two messages—one providing instructions or a magic password link, and another confirming the password change.
How is this different from using the transactional API?
The transactional API has guard rails in place to make sure that you stay within FCC, CAN-SPAM, and other strict messaging regulations. It’s limited to a single message per API call. Transactional messages don’t go through an automation/journey workflow, so they take less processing power and tend to send faster than an automation-based transactional message.
A automation An automated process people enter when they meet your criteria. An automation has a trigger (who enters, and when), a workflow of messages and actions, and exit criteria (when they leave). A person's path through the workflow is their journey. A key-value pair that you associate with a person or an object—like a person's name, the date they were created in your workspace, or a company's billing date etc. Use attributes to target people and personalize messages.
If you send transactional messages using an automation, you must make sure that you abide by appropriate regulations.
Set up your transactional automation
A transactional automation is basically an event-triggered automation, where the event represents your audience’s action and your automation performs the expected response—messages, attribute updates, etc.
1. Send an event
Before you create an automation, you should send an event representing your transaction. That way you’ll have all your event information ready when you create your automation.
You can send events using our JavaScript snippet, the API or one of our libraries.
For this recipe, we’ll send a purchase event into our workspace.
curl -i https://track.customer.io/api/v1/customers/:id/events \
  -X POST \
  -u YOUR-SITE-ID-HERE:YOUR-SECRET-API-KEY-HERE \
  -d name=purchase \
  -d data[price]=13.45 \
  -d data[product]=socks
Confirm that this event appears in your workspace by going to the Profile activity and filtering for events. A purchase event should appear for the customer corresponding to the id in the request.
2. Create an event-triggered automation
After you verify that your event appears in your workspace, go to Automations > Create Automation. Give your automation a name that makes its purpose clear so you can track it later (in this case, we used Order Confirmation).
Select Event as the trigger type.
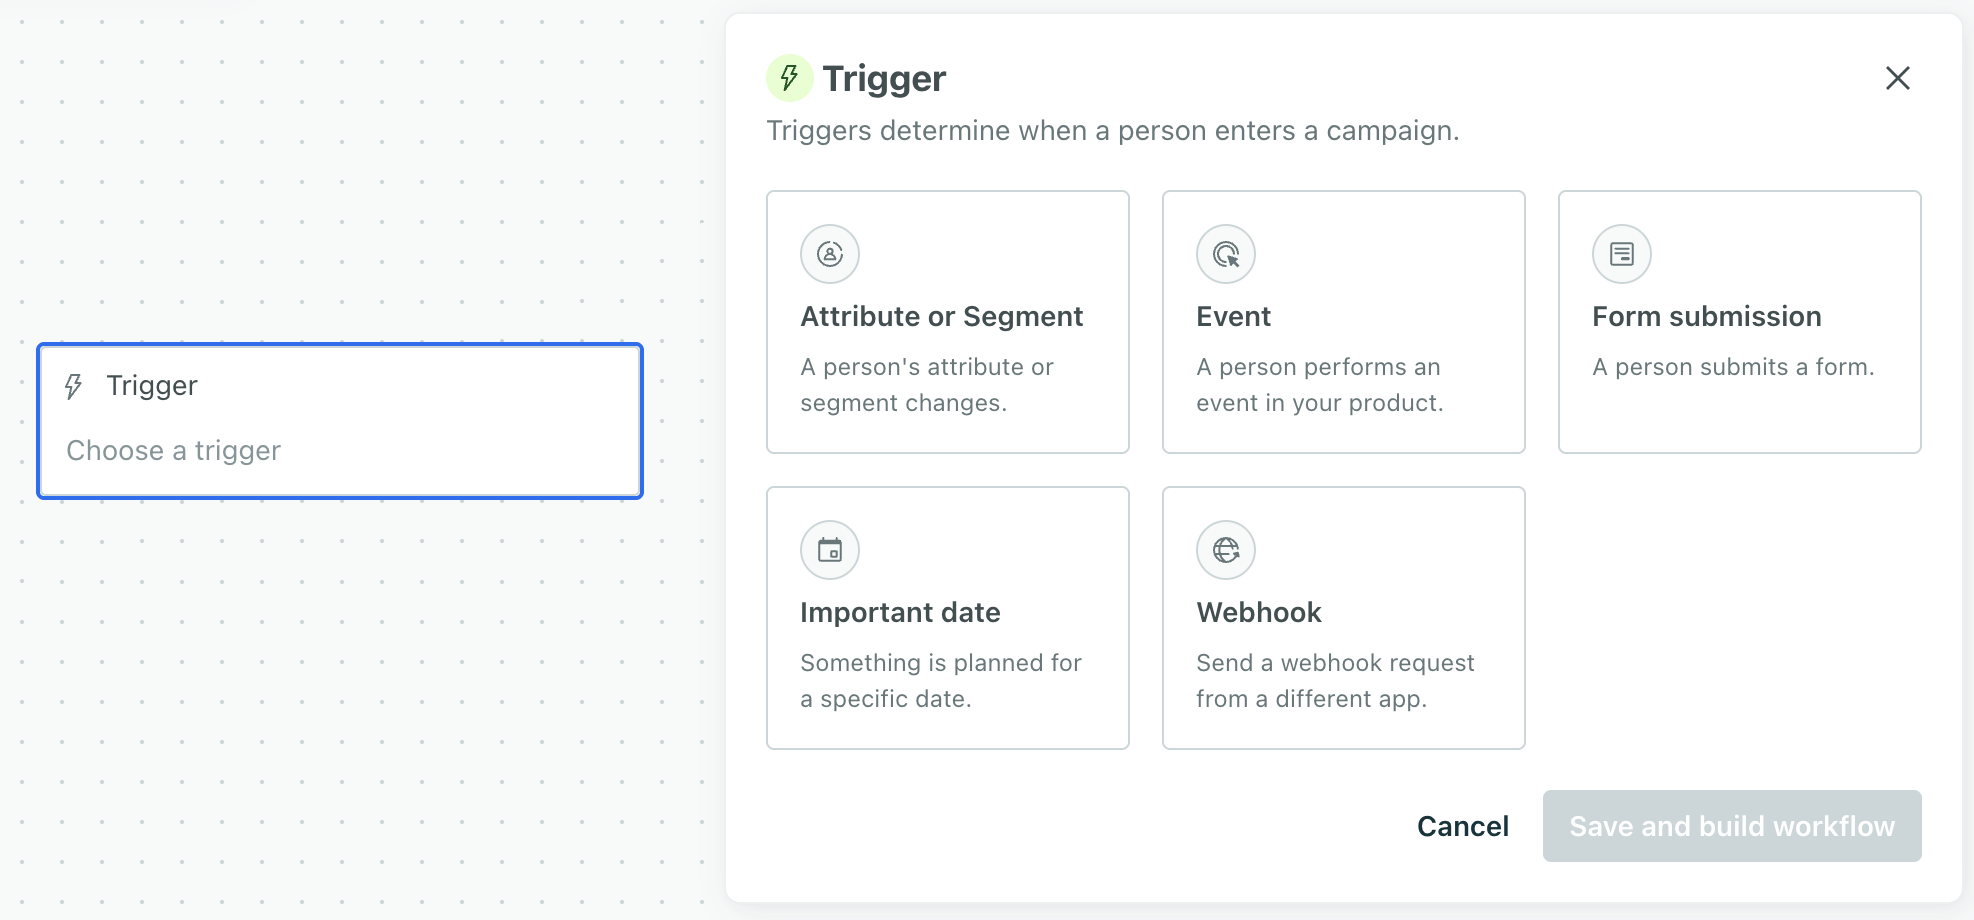
Under Conditions, find the event you sent in earlier steps.
A person will enter your automation when they perform the purchase event—i.e. when someone makes a purchases.
If your automation is truly transactional (it does not contain marketing content and your audience implicitly expects to receive the message), you should set your messages to send to all subscribed and unsubscribed. Click the title of your automation, then choose Manage under Messages to adjust your audience.
3. Build your workflow
Click Save to continue to the next step. In the Workflow Builder, you have full control over the content and schedule of your messages. An automation can be simple and include one message—a receipt for the purchase.
For our example, we’re going to send a message and add some customer attributes:
- An attribute update to keep an internal order count for the customer
- A transactional email receipt, framed as a thank you message
- A T/F branch to determine if this purchase is the customer’s first purchase
- Another attribute update; if the purchase is the customer’s first, we’ll set an attribute to trigger a downstream automation that offers the customer a coupon for a follow-up purchase.
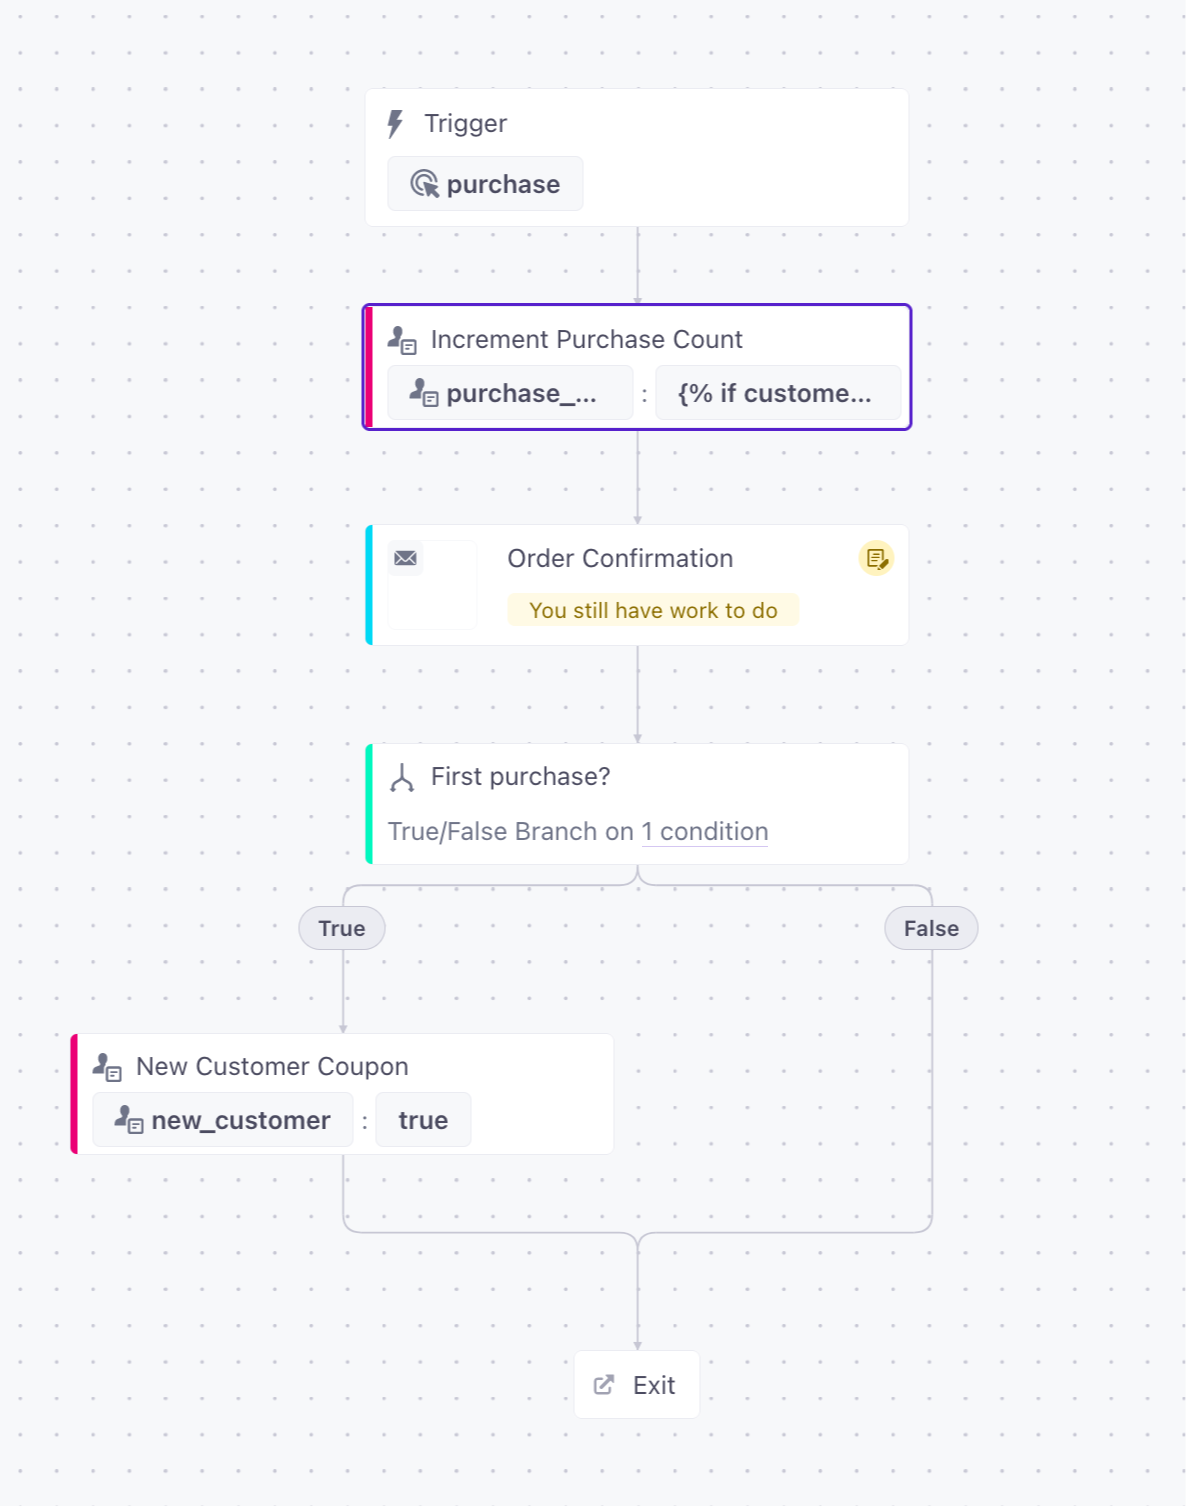
These options can turn simple transactional messages into powerful automations that build customer loyalty through automated, yet personalized, messages.
4. Set a Goal and Exit Conditions (optional)
Because transactional messages are intended to be purely informational, and expected by your audience, you may not need to set a goal or exit conditions.
But, if you want to make sure that your transactional messages resonate with your audience, you might set a goal—like a follow up purchase, or someone clicking related items in your message. Learn more about goals and exit conditions.
5. Review and Activate your automation
Before you activate your automation, you should check for errors or missing workflow actions. Make sure that you’re comfortable with your automation’s timing, message names, and sending behaviors. When you’re satisfied, click Start, and that’s it! Go to the automation’s overview page after the emails start sending to see how your automation performs.
Wrap Up
Transactional messages are an essential part of any business and are often underutilized by product and marketing teams. Good transactional emails are timely, personalized, and provide value to your audience (and company).
We hope this guide provides both instruction and inspiration for your transactional messages! If you have any questions about the process or how to apply it to your business, please send us a message!