Set journey attributes
UpdatedJourney attributes help you temporarily store data that you want to use in your campaign—like properties from a webhook or data from a collection query.
Unlike customer attributes, journey attributes don’t persist on a person’s profile—they automatically expire when the person exits the campaign. This keeps your workspace data clean while still letting you use data for personalization, conditions, and branching within a workflow.
How it works
You can set journey attributes in three ways:
| Method | Use case |
|---|---|
| Set journey attributes action | Set values directly based on profile attributes, trigger data, liquid, or JavaScript. For instance, you might do this to temporarily store a discount code while a person is actively in a campaign. |
| Webhook response | Store data returned from an external API. Learn more on setting journey attributes in a webhook action. |
| Collection query | Store results from a collection query. Learn more on setting journey attributes in a collection query action. |
After you set a journey attribute, you can use it to:
- Personalize messages with this liquid syntax:
{{journey.<attribute_name>}} - Create branch conditions to send people down different paths
- Set action conditions on messages, delays, or other blocks
from webhook, collection,
or action block] a-->b[Use in messages
with liquid] a-->c[Create branch
conditions] a-->d[Set action
conditions] b-->e[Journey ends] c-->e d-->e e-->f[Journey attributes
automatically deleted] style f fill:#FFC4CF,stroke:#69002C
Set journey attributes action
To set journey attributes in a campaign, follow these steps:
- Drag the Set journey attributes action into your workflow, and then configure the attributes you want to set.
- Click the action Name to add your own descriptor. You can also set action conditions if you don’t want everybody in your workflow to trigger this action.
- Click Add details.
- Click Add attribute to set your journey attribute.
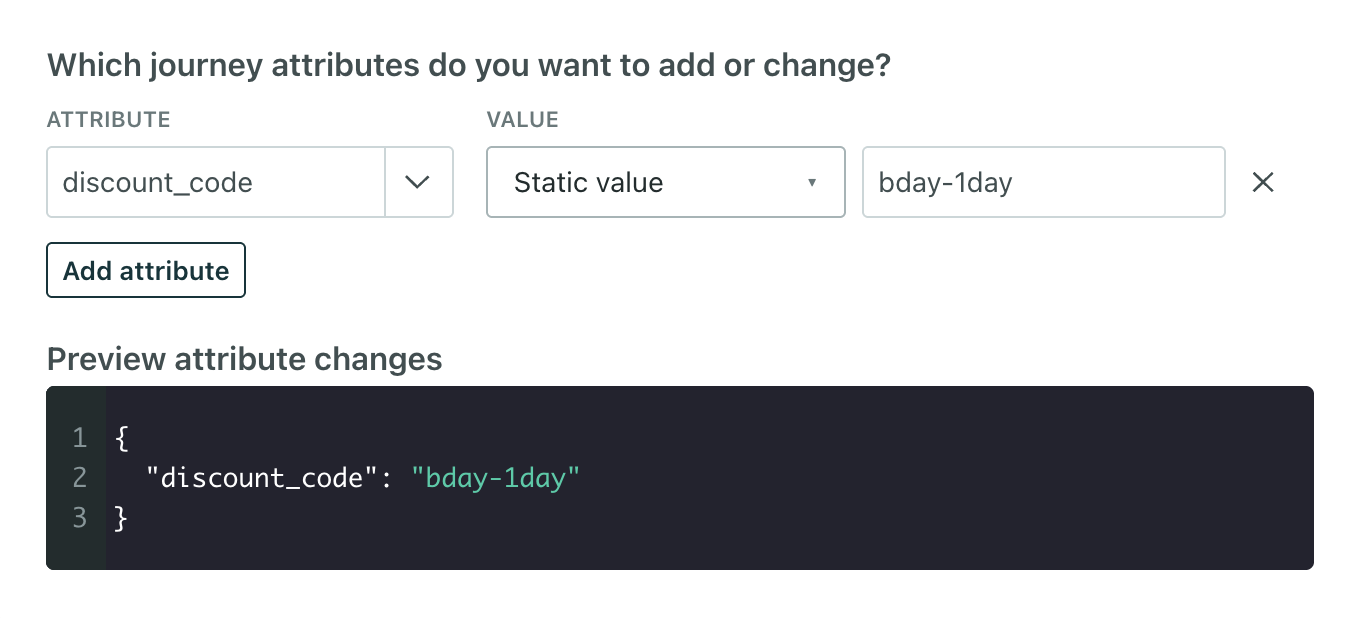
- Attribute is the name of the journey attribute. Reference it later in liquid as
{{journey.<attribute_name>}}. In the example above, you could use{{journey.discount_code}}in a subsequent message. - Value is the type of data you want to set for your attribute—a profile attribute, trigger attribute, a static value, liquid, or JavaScript. Learn more about setting attributes.
- Attribute is the name of the journey attribute. Reference it later in liquid as
- Click Save Changes when you’re done.
You don’t need a delay after this action
Your campaign workflow will automatically wait for the attribute update to finish before moving to the next step. You don’t need to add a delay after a Set journey attributes action—the workflow won’t proceed until the update finishes.
Limits on journey attributes
- Overall limit: 100 journey attributes per journey. You can create or change up to 100 journey attributes during a single journey. Updates beyond this limit fail, and the person moves forward without the update.
- Attribute name limit: 128 bytes
- Attribute value limit: 100 KiB
Use journey attributes in your workflow
Reference journey attributes in messages
Use the journey object in liquid to include journey attribute data in messages. If the attribute value is an object (not an array), access properties directly:
{{ journey.promo_course.name }}
{{ journey.promo_course.description }}
If the data is an array, you can loop through the data:
{% for item in journey.course_recommendations %}
  {{ item.name }}
{% endfor %}
You can also use liquid filters like first, last, and map to access specific items in the array:
{% assign first_course = journey.course_recommendations | first %}
{{ first_course.name }}
Preview journey attributes in messages
To preview journey attributes, you need to provide sample data. Otherwise, we won’t render anything in the preview:
- Open the Sample data panel in the message editor.
- Select the Journey tab.
- Enter test values under your attribute names.
In the message preview, you’ll see the sample value render.
Like with any other liquid variables, if we can’t retrieve a value for the journey attribute when we attempt to send the message, the message will fail to send.
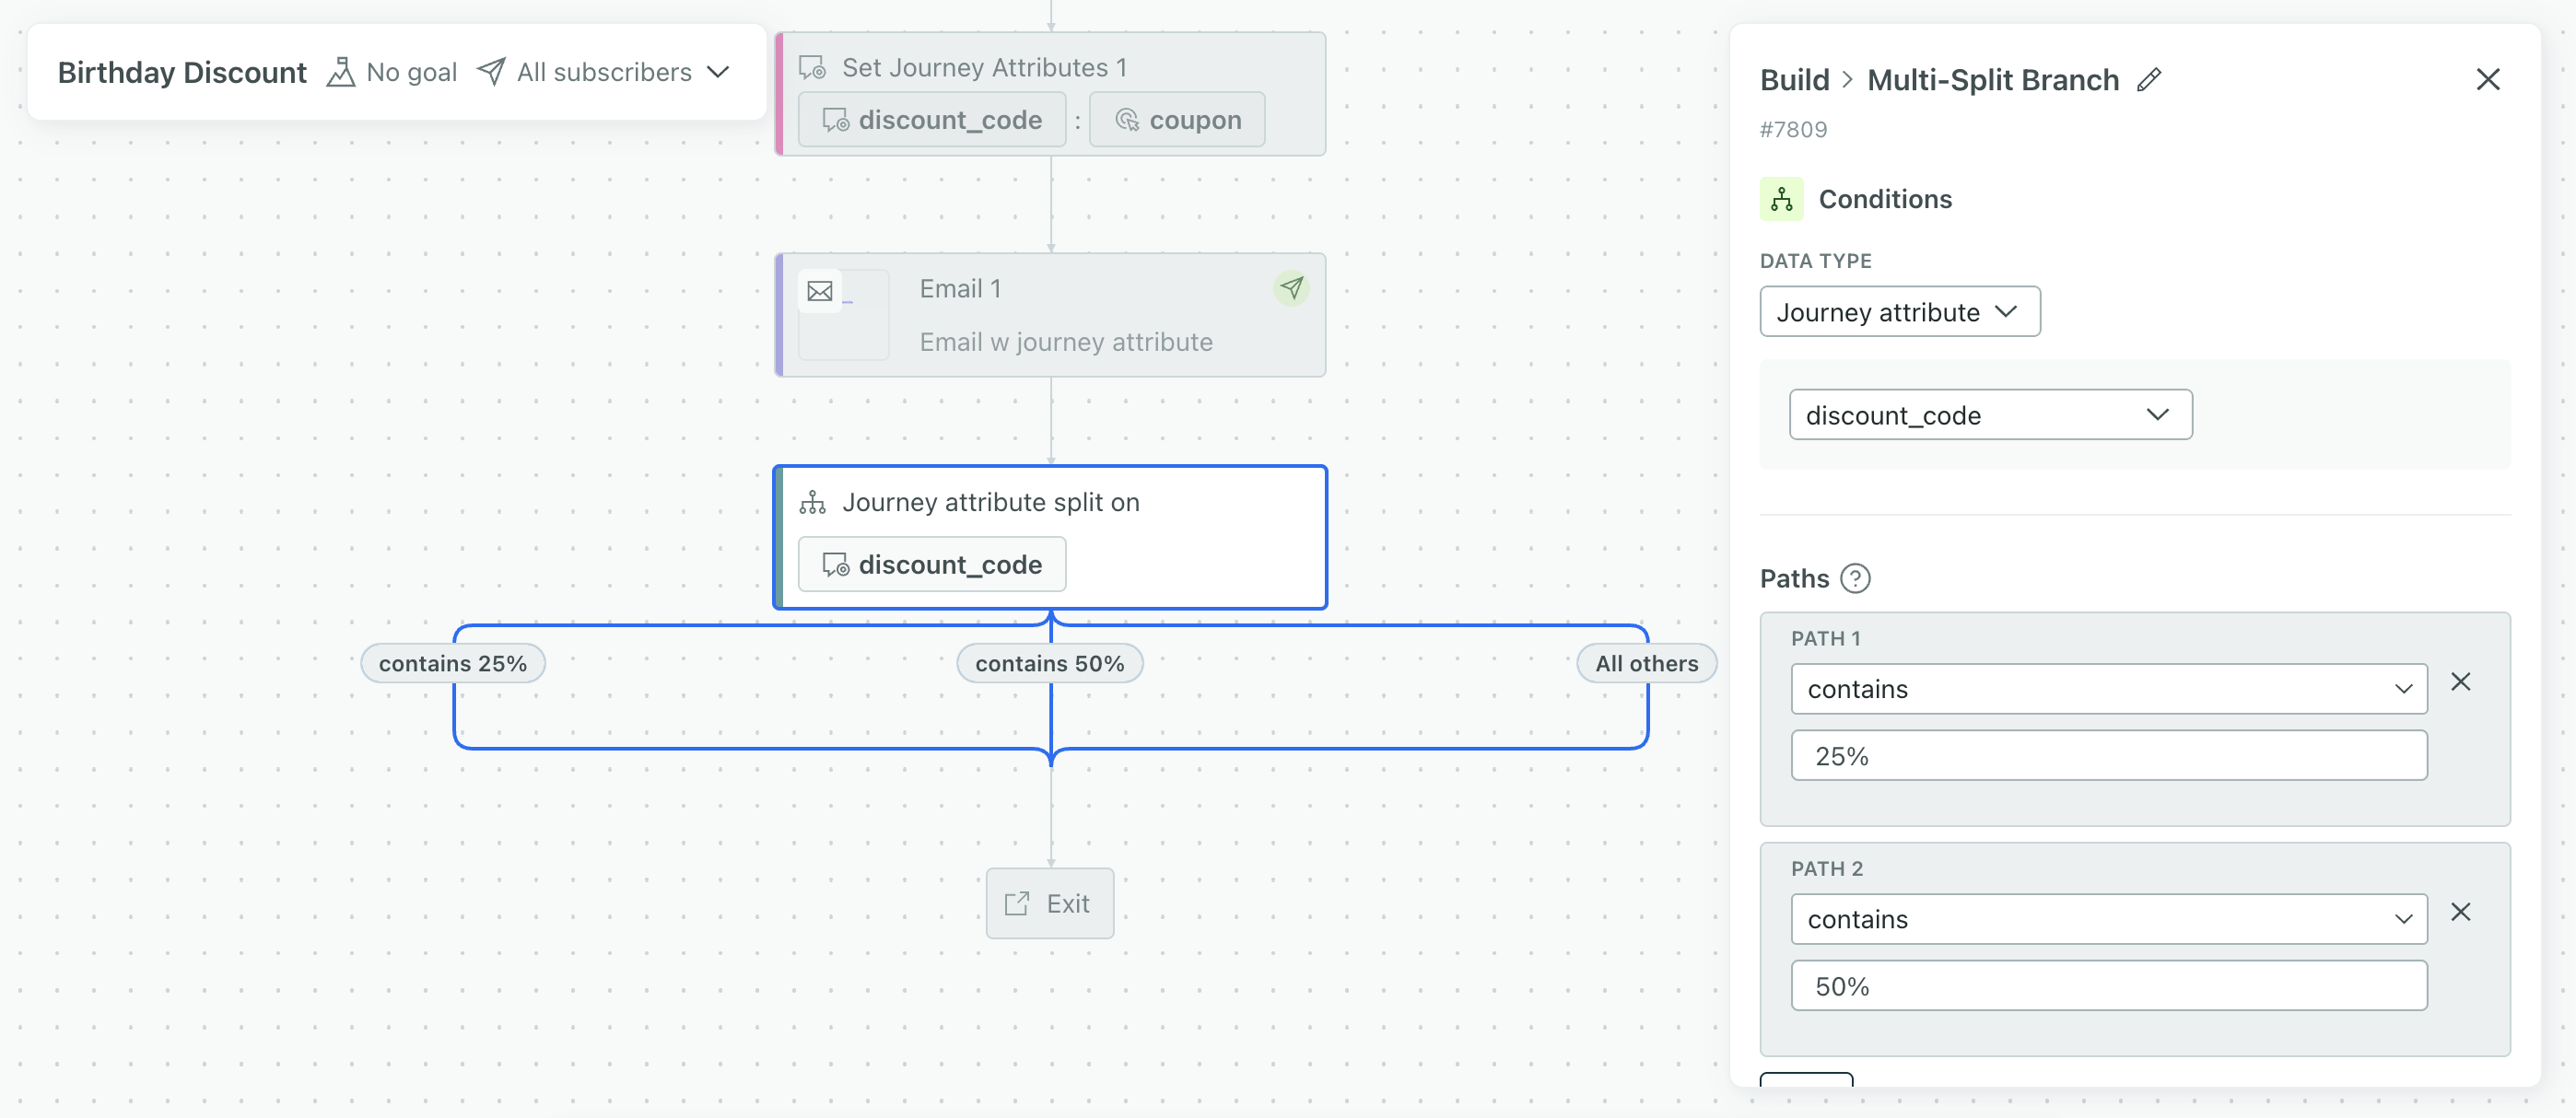
Reference journey attributes in conditions
After you set a journey attribute, you can use it in any condition in your workflow—including branch conditions and action conditions. For example, you could send people down different paths in a multi-split branch based on a journey attribute value. You could also only send an email to people when their journey attribute contains a certain value.