Authentication
UpdatedTo use the SDK, you’ll need two kinds of API keys: A CDP API Key to send data to Customer.io and a Site ID, telling the SDK which workspace your messages come from.
These keys come from different places in Customer.io!
- CDP API Key: You’ll get this key when you set up your mobile app as a data-in integration in Customer.io.
- Site ID: This key tells the SDK which workspace your in-app messages come from. You’ll use it to support
inAppmessages. If you’re upgrading from a previous version of the Customer.io SDK, it also serves as themigrationSiteId.
Get your CDP API Key
You’ll use your write key to initialize the SDK and send data to Customer.io; you’ll get this key from your Expo entry under Data & Integrations > Integrations. If you don’t see your app on this page, you’ll need to add a new integration.
- Go to Data & Integrations > Integrations.
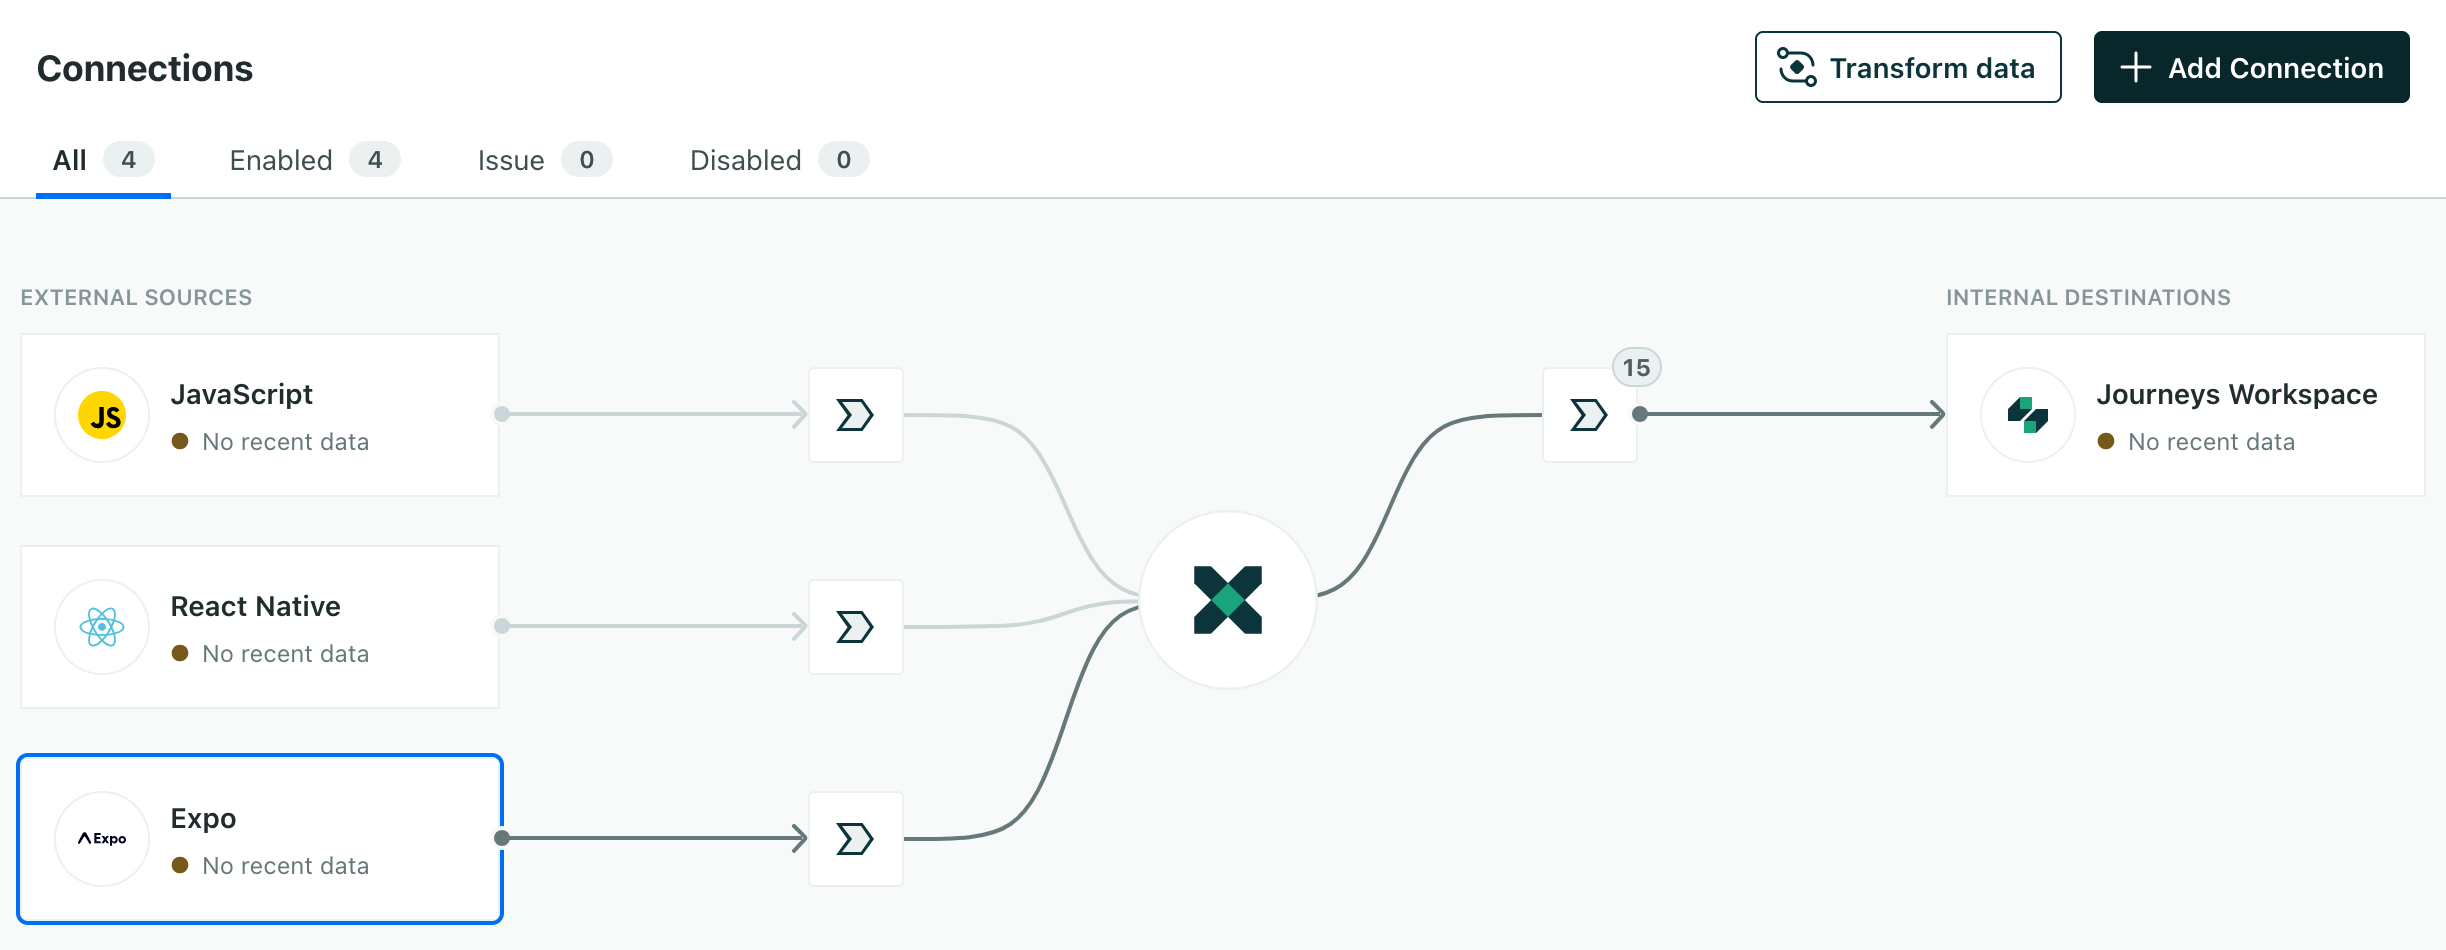
- Go to the Connections tab and find the entry for your Expo app. If you don’t see Expo in the list of connections, you’ll need to add a new integration.
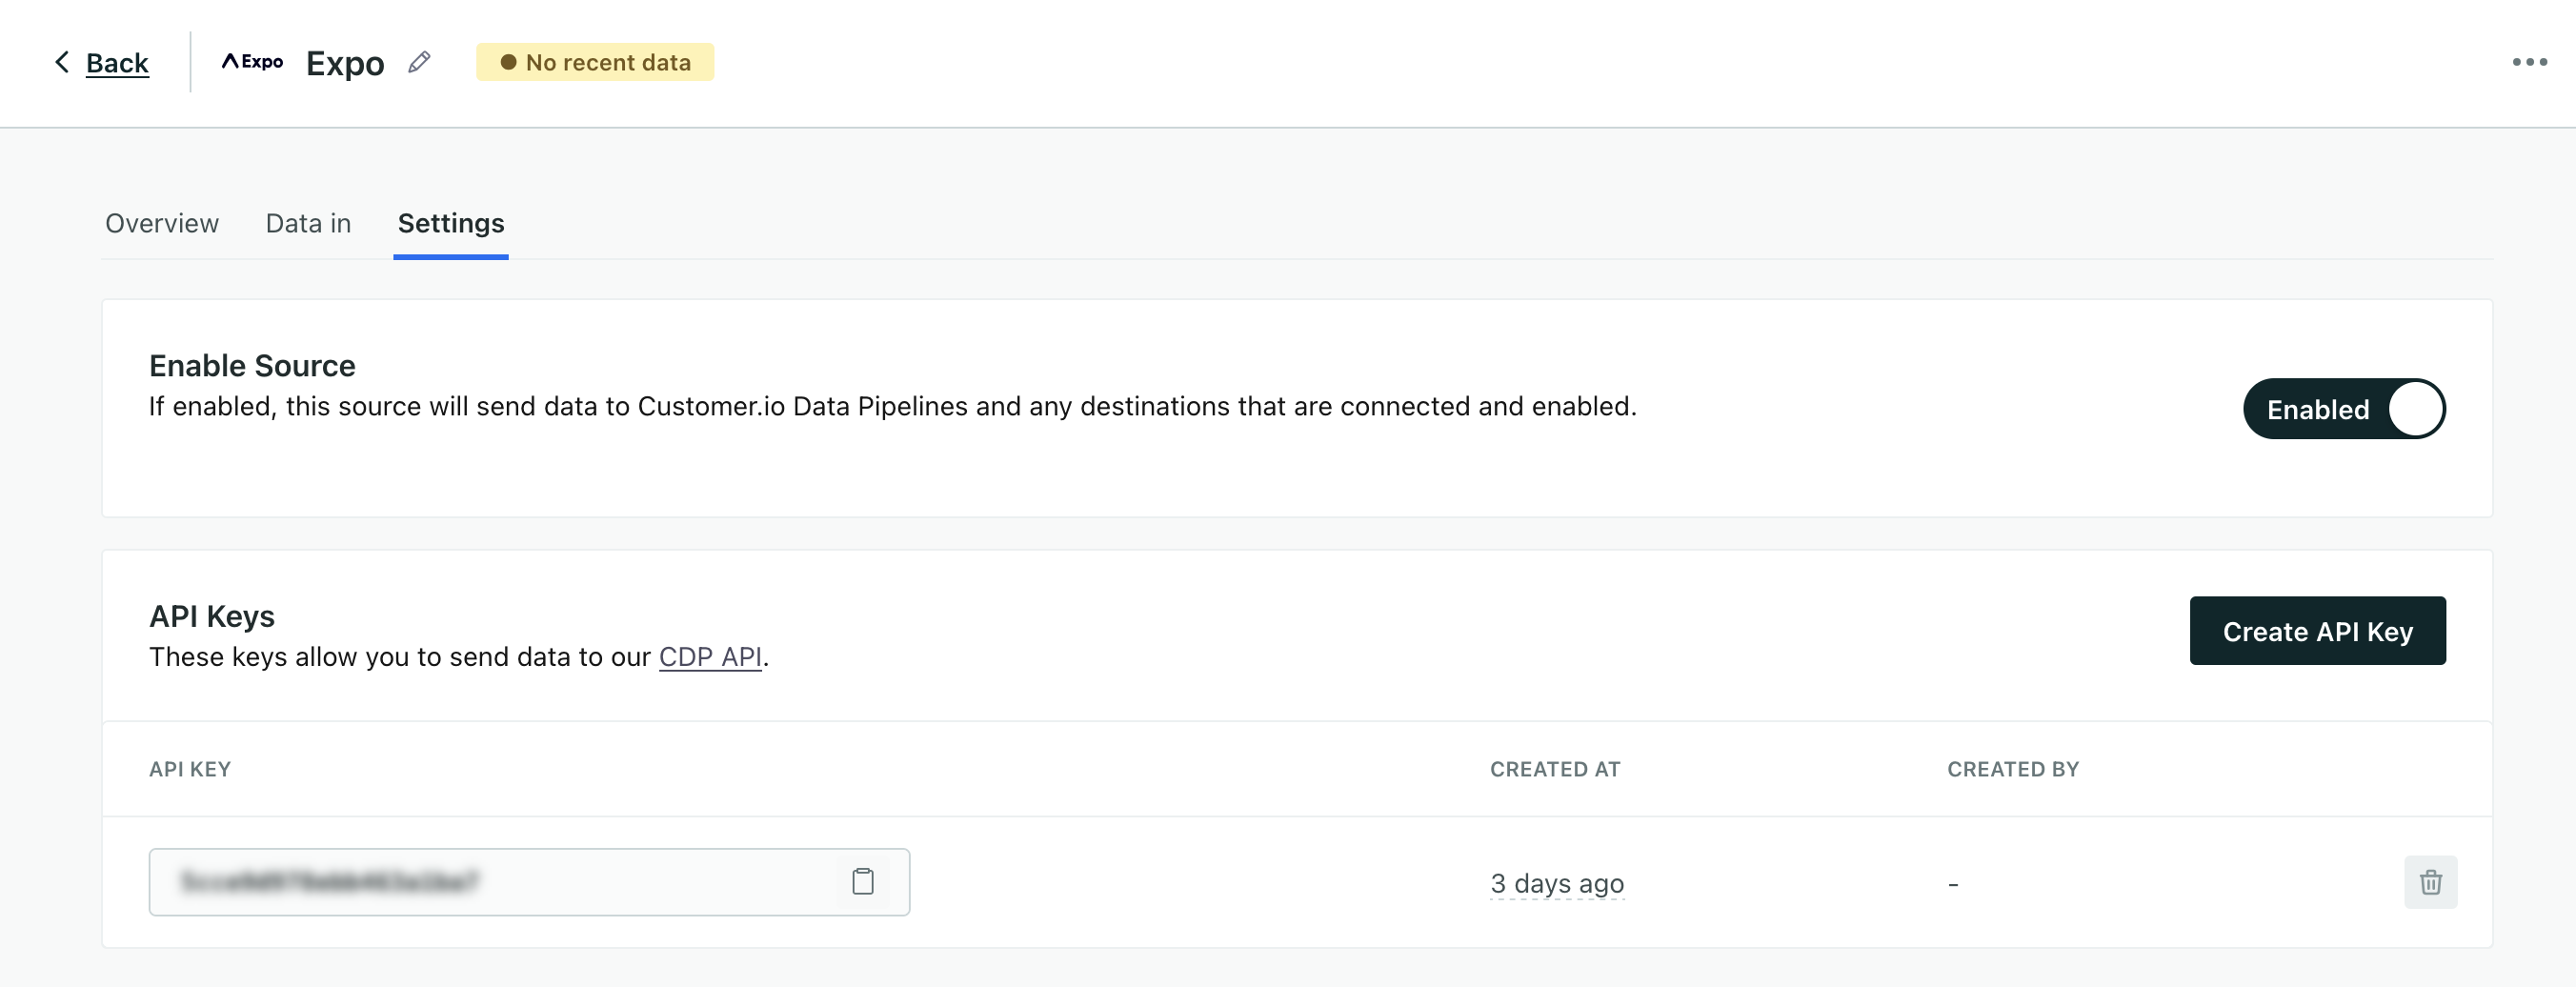
- Go to Settings and find your API Key. Copy this key and use it in your app configuration.
Auto-initialization (Expo 53+)
Add the key to the config object in your app.json file:
{
   "expo": {
      "plugins": [
         [
            "customerio-expo-plugin",
            {
               "config": {
                  "cdpApiKey": "<CDP_API_KEY>",
                  "region": "us", // use "eu" if in EU region
                  "siteId": "<SITE_ID>", // Required for in-app messaging
                  "migrationSiteId": "<OLD_SITE_ID>" // Required if migrating from an earlier version
               },
               "android": {
                  "googleServicesFile": "./files/google-services.json",
                  "setHighPriorityPushHandler": true
               },
               "ios": {
                  "pushNotification": {
                     "useRichPush": true
                  }
               }
            }
         ]
      ]
   }
}
Manual initialization
Add the key to the customerio-expo-plugin object in your app.json file and your app’s code:
In app.json:
{
   "expo": {
      "plugins": [
         [
            "customerio-expo-plugin",
            {
               "android": {
                  "googleServicesFile": "./files/google-services.json",
                  "setHighPriorityPushHandler": true
               },
               "ios": {
                  "pushNotification": {
                     "useRichPush": true,
                     "env": {
                        "cdpApiKey": "<CDP_API_KEY>",
                        "region": "us"
                     }
                  }
               }
            }
         ]
      ]
   }
}
In your app’s code:
import { CioRegion, CustomerIO, CioConfig } from 'customerio-reactnative';

const App = () => {
   useEffect(() => {
      const config: CioConfig = {
         cdpApiKey: 'CDP API Key', // Mandatory
         migrationSiteId: 'siteId', // Required if migrating from an earlier version
         region: CioRegion.US,
         inApp: {
            siteId: '<your_site_id>',
         },
      };
      CustomerIO.initialize(config);
   }, []);
};
Add a new integration
If you don’t already have a write key, you’ll need to set up a new connectionRepresents an integration between Customer.io and another service or app under Data & Integrations > Integrations. A connection in Customer.io provides you with API keys and settings for your integration.. The connection represents your app and the stream of data that you’ll send to Customer.io.
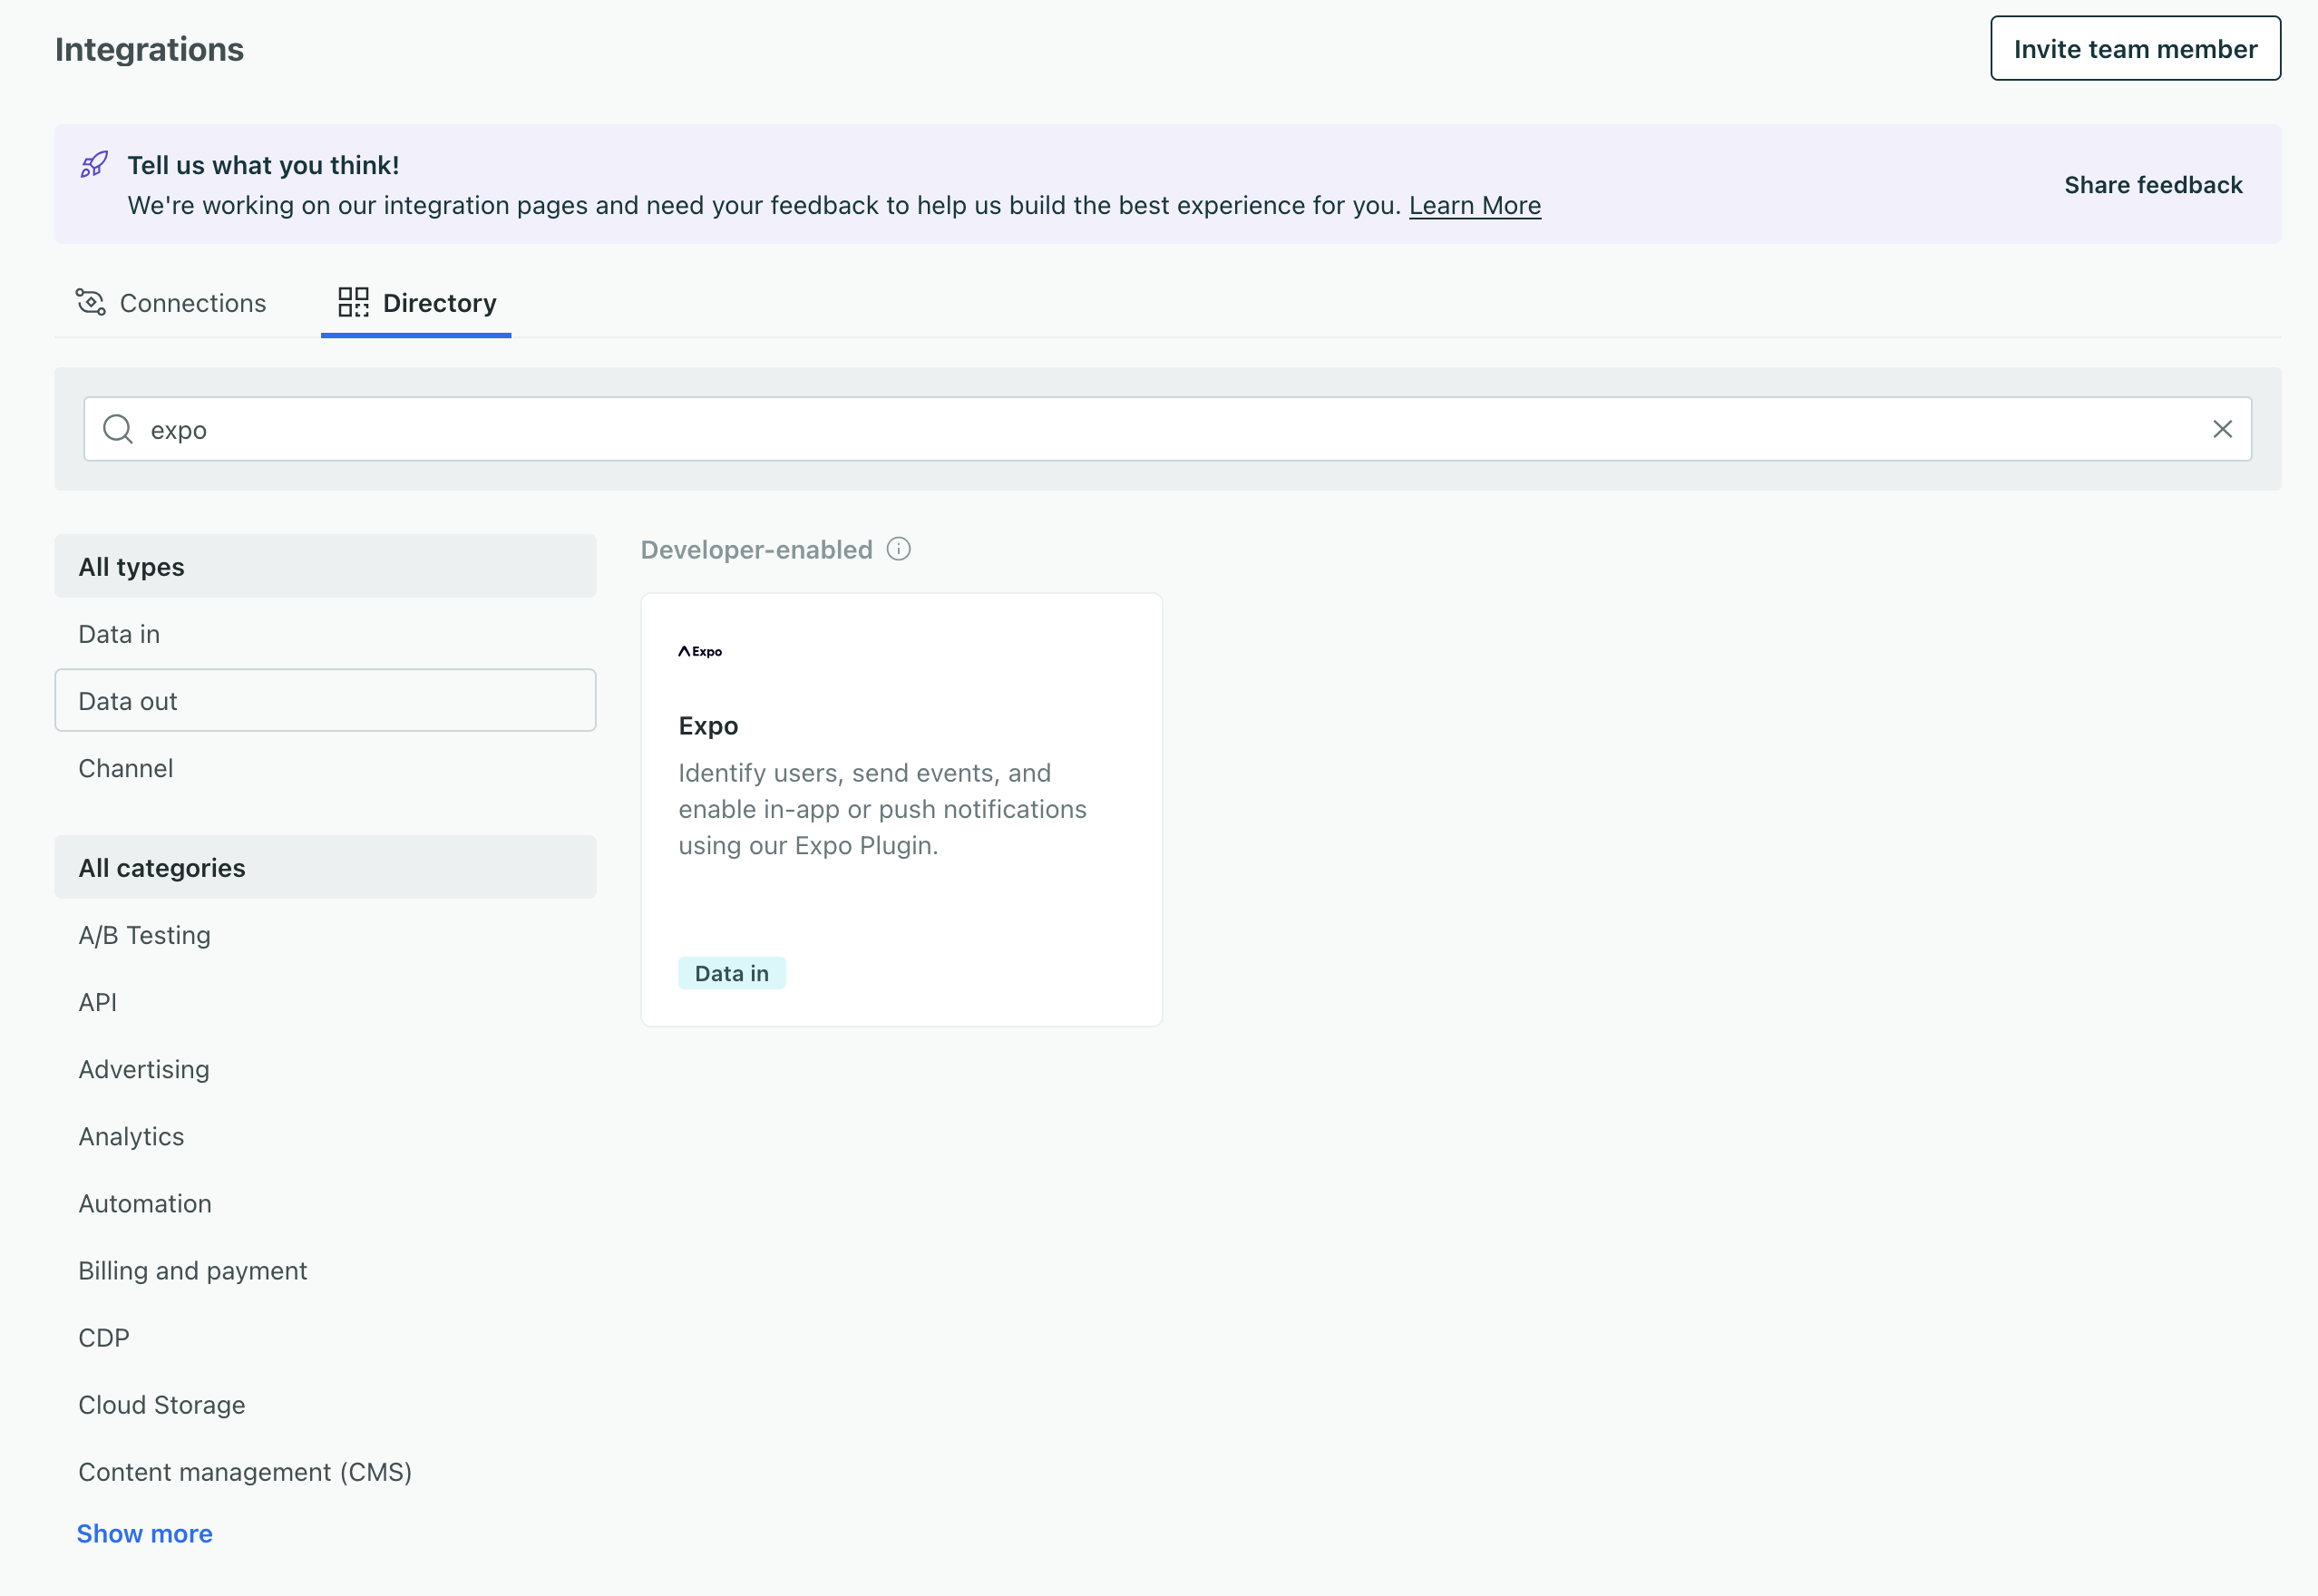
- Go to Data & Integrations > Integrations and click the Directory tab.
- Find and select the Expo integration.

- Enter a Name for the integration, like “My Expo App”.
- We’ll present you with a code sample containing a
cdpApiKeythat you’ll use to initialize the SDK. Copy this key and keep it handy. You’ll use it to initialize the SDK in your Expo app. - (Optional) Set up your Expo app and click Test Connection.
- If you tested your connection first, click Complete Setup. Otherwise, click Save & Complete Later.
Get your Site ID
You’ll use your site ID with the inApp option to support in-app messaging.
And if you’re upgrading from a previous version of the SDK, you’ll also use your site ID as your migrationSiteId. This key is used to send remaining tasks to Customer.io when your audience updates your app.
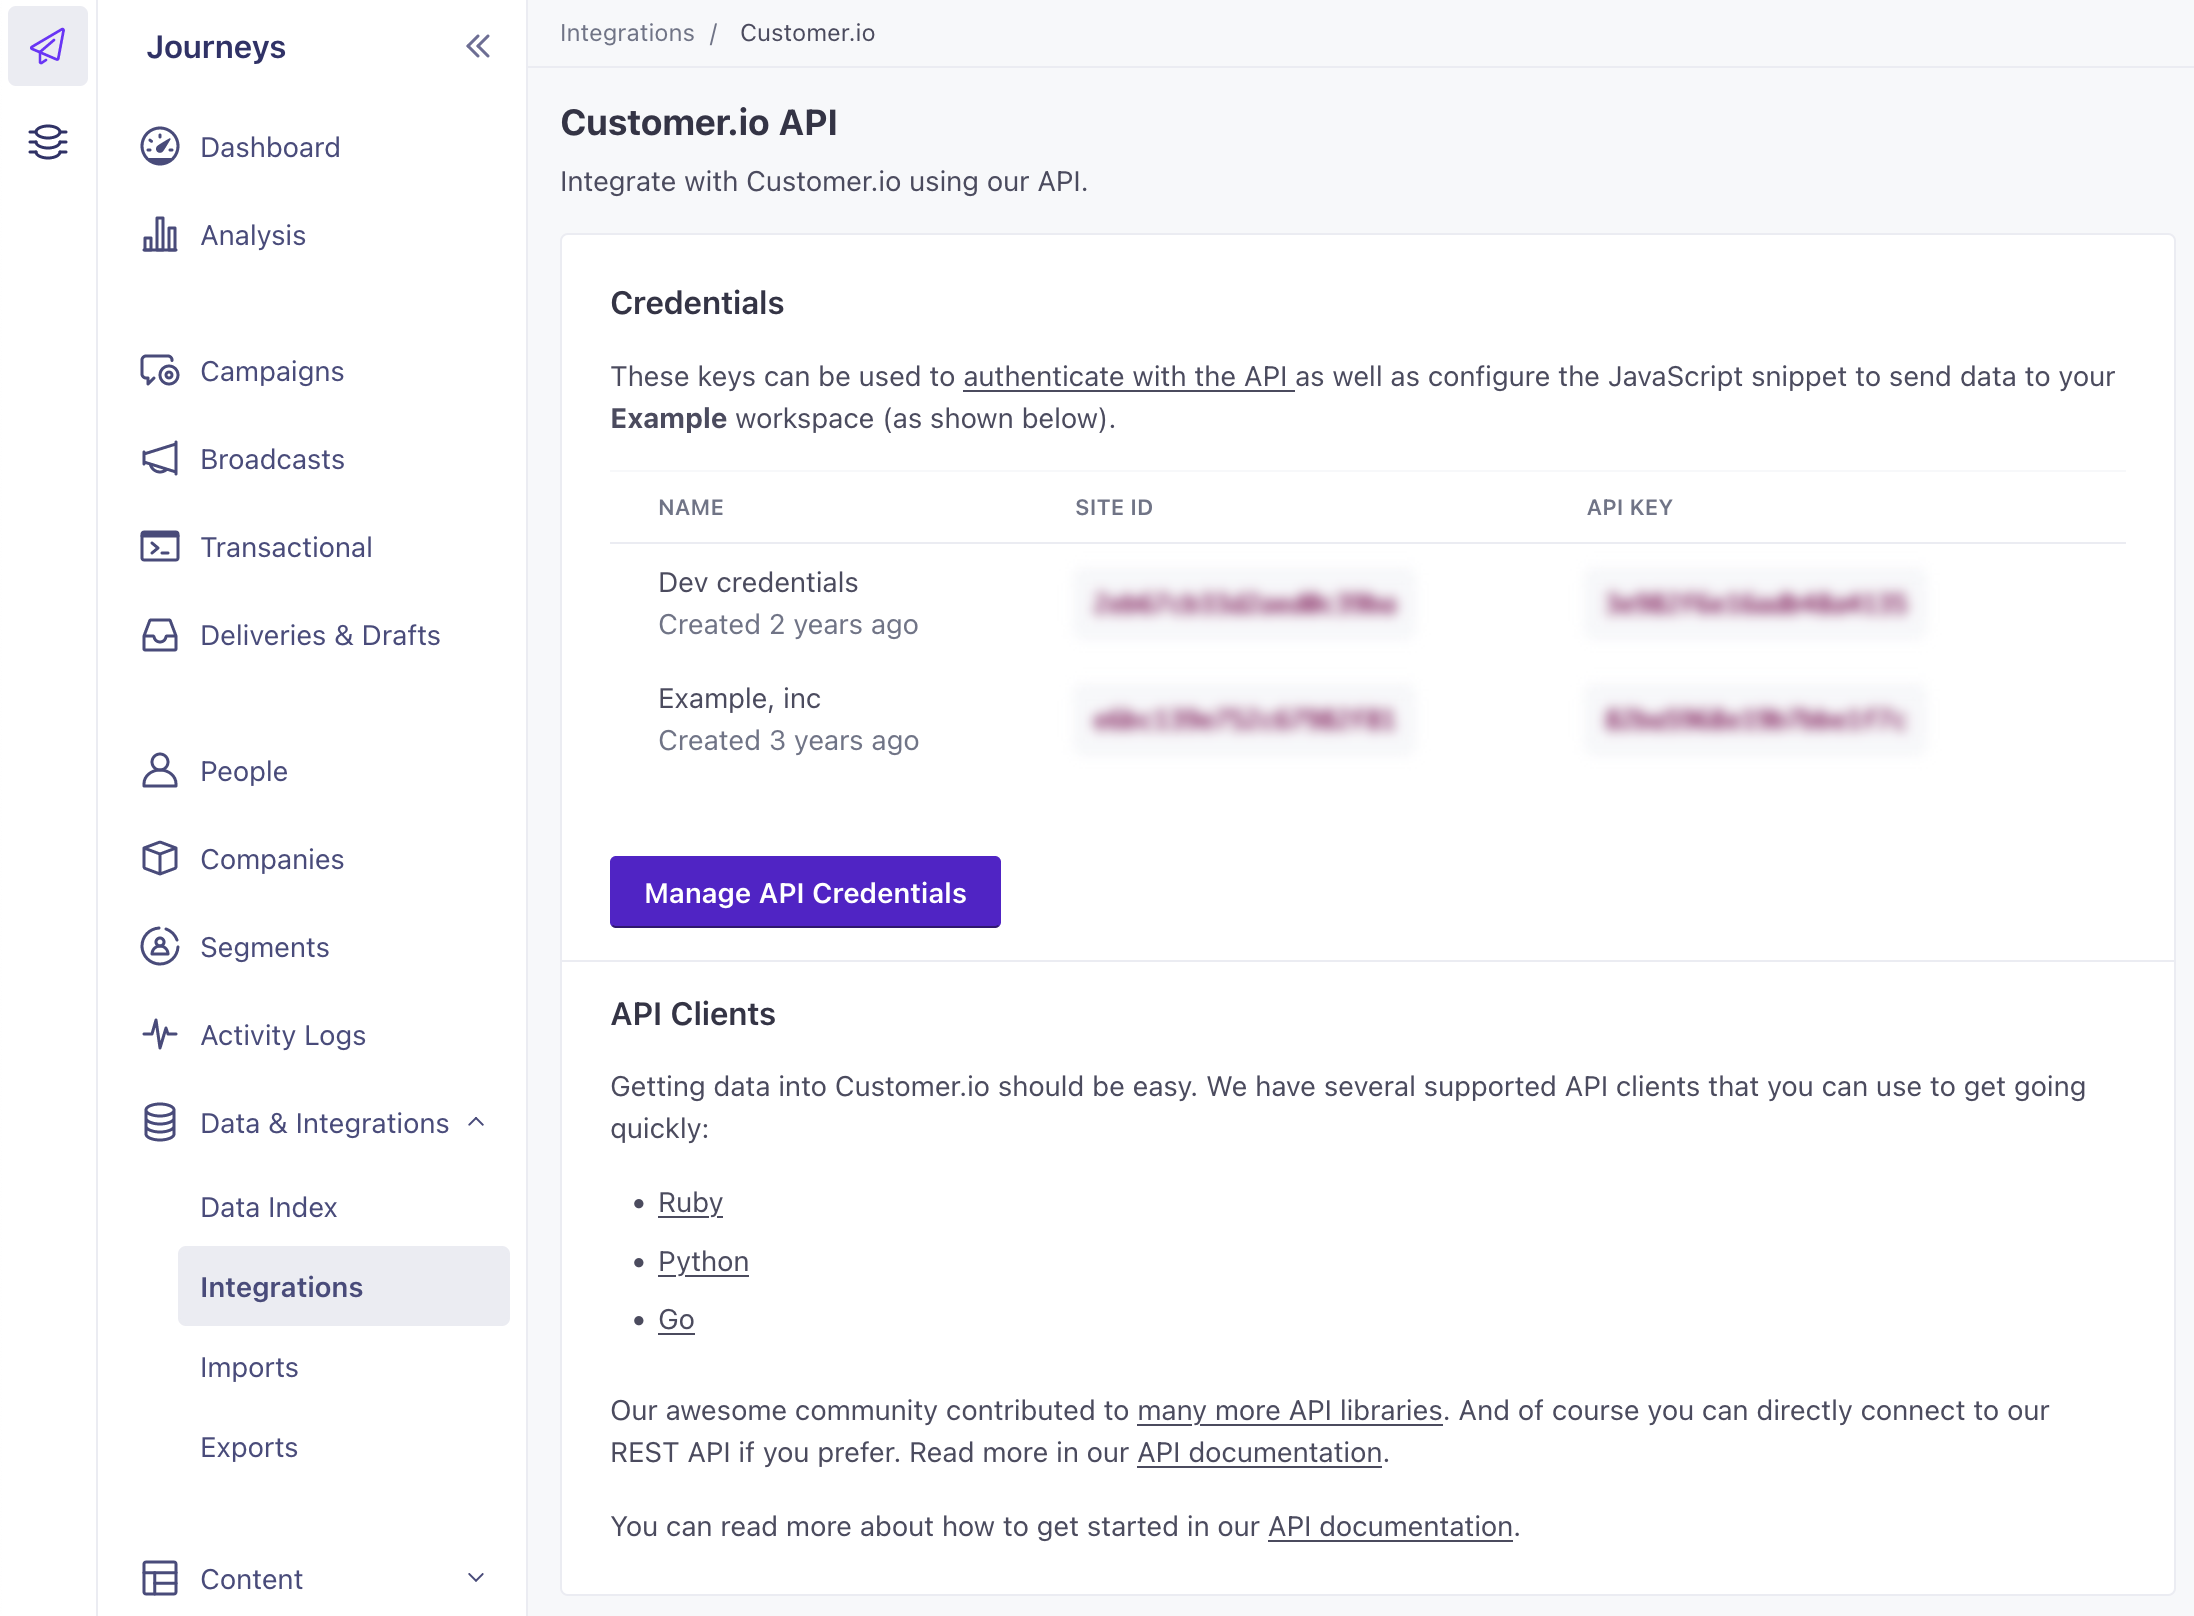
Go to Settings > Workspace Settings in the upper-right corner of the Customer.io app and go to API and Webhook Credentials.
Copy the Site ID for the set of credentials that you want to send your in-app messages from. If you don’t have a set of credentials, click Create Tracking API Key.
Use this Site ID to enable in-app messaging:
Auto-initialization (Expo 53+)
Add the Site ID to your app.json configuration:
{
   "expo": {
      "plugins": [
         [
            "customerio-expo-plugin",
            {
               "config": {
                  "cdpApiKey": "<CDP_API_KEY>",
                  "region": "us",
                  "siteId": "<SITE_ID>"
               }
            }
         ]
      ]
   }
}
Manual initialization
Use the Site ID in your app’s code to initialize the inApp package:
import {
  CioLogLevel, CioRegion, CustomerIO, CioConfig
} from 'customerio-reactnative';

const App = () => {

useEffect(() => {
   const config: CioConfig = {
      cdpApiKey: 'CDP API Key', // Mandatory
      migrationSiteId: 'siteId', // Required if migrating from an earlier version
      region: CioRegion.US,
      logLevel: CioLogLevel.Debug,
      trackApplicationLifecycleEvents: true,
      inApp: {
         siteId: 'site_id',
      },
   };
   CustomerIO.initialize(config)
   }, [])
}
Securing your credentials
To simplify things, code samples in our documentation sometimes show API keys directly in your code. But you don’t have to hard-code your keys in your app. You can use environment variables, management tools that handle secrets, or other methods to keep your keys secure if you’re concerned about security.
To be clear, the keys that you’ll use to initialize the SDK don’t provide read access to data in Customer.io; they only write data to Customer.io. A bad actor who found your credentials can’t use your keys to read data from our servers.